
To paint plywood walls, clean the panels, fill knots, voids and nail holes, sand smooth (120 grit, then 180 to 220), seal knots and apply a stain-blocking primer, then roll on two thin coats of interior acrylic latex paint in eggshell or satin, sanding lightly between coats. Sanding and priming are the two steps people skip, and they decide whether plywood looks like a finished wall or like painted sheathing.
Below you will find how to pick plywood for a painted finish, which primer and paint to buy, the full step-by-step process, what to do with seams, realistic drying times, and fixes for the problems that show up most often.
Why paint plywood walls?
Plywood walls are common in garages, workshops, basements, sheds, cabins, kids’ rooms and modern interiors that want a simple, hard-wearing surface. Plywood shrugs off knocks that would dent drywall, holds screws anywhere for shelves and tool racks, and one or two people can hang it quickly.
Painting it adds color, brightens dark spaces, protects the wood from grime and moisture, and makes the wall far easier to wipe down. A painted plywood wall can look rustic, clean and Scandinavian, or almost like smooth drywall, depending on how much prep you put in.
Choosing the right plywood for a painted wall
Plywood faces are graded by appearance, usually from A (smoothest, few repairs) through D (knots and open defects allowed). The first letter describes the face side, so AC plywood has a good face and a rough back. For painted walls, the smoother the face, the less filling and sanding you will do.
| Plywood type | Paint result | Prep effort | Good for |
|---|---|---|---|
| Sanded hardwood plywood (birch, maple) | Smoothest, closest to cabinetry | Low | Living spaces, feature walls |
| Sanded softwood (AC, BC grades) | Good, some grain may show | Moderate | Basements, kids’ rooms, offices |
| CDX sheathing | Rustic, knots and patches visible | High | Garages, sheds, workshops |
| Pre-primed or MDO plywood | Very smooth, paint-ready surface | Low | High-quality painted finishes |
| Pressure-treated plywood | Only after it has fully dried | High | Rarely used indoors |
If the walls are already up, you work with what you have. On a new build, spending a little more on sanded or pre-primed panels saves hours of filling and sanding later, and usually means one fewer coat of paint.
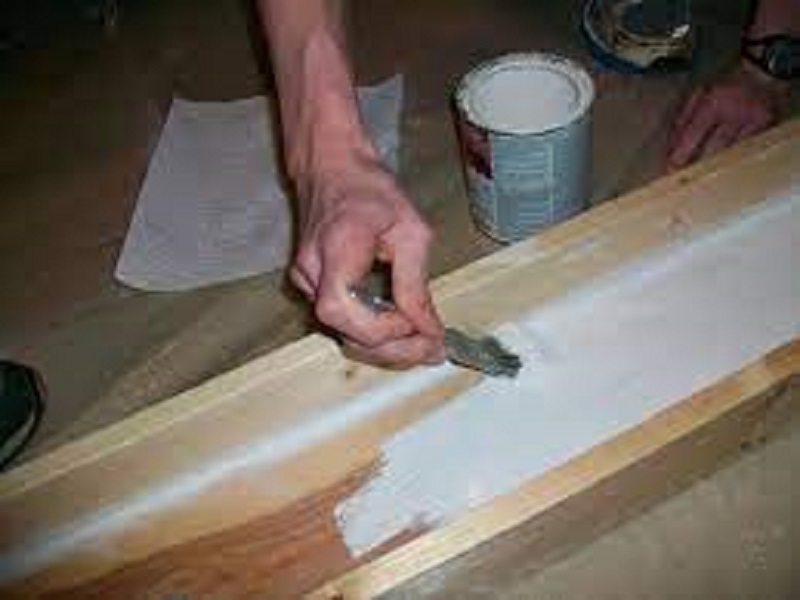
Tools and materials checklist
- Random orbital sander or sanding block, with 120 and 180 to 220 grit paper
- Paintable wood filler and a flexible filling knife
- Paintable acrylic caulk for inside corners and trim gaps
- Stain-blocking primer (shellac-based or oil-based for knots, plus a quality bonding primer for the field of the wall)
- Interior acrylic latex paint, or oil-based enamel if you want a very hard finish
- Short-nap roller (about 3/8 inch), angled brush, tray, painter’s tape and drop cloths
- Vacuum with a brush attachment, plus a tack cloth or microfiber cloth
- Dust mask or respirator and safety glasses
Primer and paint: what to use
Primer
Bare plywood is thirsty and uneven, and knots and some species bleed yellow or brown stains through paint. A stain-blocking primer seals the surface so the topcoat goes on evenly and looks the same color across every sheet.
Shellac-based primers are excellent for spot-sealing knots and dry in under an hour. Oil-based primers seal well and tend to raise the grain less than water-based products on softwood plywood. Many modern water-based stain-blocking primers also perform well; check the label for wood and knot sealing before you buy.
Latex vs oil-based paint
| Factor | Acrylic latex (water-based) | Oil-based or alkyd enamel |
|---|---|---|
| Odor and fumes | Low | Strong; needs ventilation |
| Drying time | Fast, usually recoatable in a few hours | Slow, often a day between coats |
| Durability | Good, flexible, resists cracking | Very hard, can yellow over time |
| Clean-up | Soap and water | Mineral spirits |
| Best for | Most interior plywood walls | High-wear workshop walls, trim |
For most homes, a 100% acrylic interior paint in eggshell or satin strikes the best balance. Flat paint hides imperfections but scuffs easily; semi-gloss wipes clean but highlights every flaw in the wood. Water-based alkyd hybrid paints are a good middle ground if you want a harder finish without solvent fumes.
How to paint plywood walls: step by step
- Protect the room. Cover floors, remove outlet and switch covers, and tape off trim, windows and the ceiling line.
- Clean the panels. Vacuum dust and cobwebs, then wipe with a damp cloth. In garages, degrease oily patches with a mild cleaner and let the wood dry fully.
- Set fasteners and fill. Tap proud nail or screw heads just below the surface. Fill holes, voids, splits and edge gaps with wood filler, overfilling slightly so you can sand flush.
- Sand. Use 120 grit to flatten filler and knock down rough grain, then 180 to 220 grit for a smooth surface. Sand with the grain and avoid cutting through the thin face veneer.
- Remove dust. Vacuum and wipe with a microfiber or tack cloth. Dust left behind turns into a gritty finish.
- Spot-seal knots. Dab shellac-based primer over knots and sap streaks and let it dry.
- Prime everything. Cut in corners with a brush, then roll primer one panel at a time, finishing each with light strokes in one direction.
- Scuff sand. Primer often raises the grain. Once dry, sand lightly with 220 grit and wipe clean.
- Caulk. Run paintable caulk along inside corners and where plywood meets trim, smoothing it with a damp finger.
- Apply the first coat. Cut in, then roll a thin, even coat, keeping a wet edge to avoid lap marks.
- Sand lightly and apply the second coat. Wait for the recoat time on the can, knock down any nibs with fine paper, wipe and roll the final coat.
- Let it cure. Paint can feel dry in an hour or two but takes much longer to harden. Avoid hanging heavy items or scrubbing for at least a few days, longer in cool or humid weather.
Pro tips for a better finish
- Work in good light. Shine a work lamp across the wall at a low angle while sanding and filling; it exposes dips and ridges you will not see head-on.
- Tint the primer. Ask the store to tint primer toward your paint color, especially with deep shades, so two topcoats give full coverage.
- Roll each sheet as a unit. Finishing a whole panel before moving on keeps the sheen consistent and makes seams look intentional.
- Condition the wood. Let new plywood sit in the room for a couple of days before installing so it adjusts to the indoor humidity, which reduces seam movement after painting.
- Buy enough paint at once. Mixing a second batch midway can produce a slight color shift between walls.
What to do about the seams
Plywood expands and contracts with humidity, so the joints between sheets move. That leaves three realistic options:
- Celebrate them: leave a small, even gap or a slight chamfer so the joints read as a deliberate panel pattern. This is the lowest-maintenance look.
- Cover them: nail thin battens over each seam for a board-and-batten style that also hides uneven edges.
- Hide them: tape and fill like drywall. It can look seamless at first, but hairline cracks often return as the wood moves, so expect occasional touch-ups.
Common problems and fixes
| Problem | Likely cause | Fix |
|---|---|---|
| Grain showing through | Thin primer, porous face | Second primer coat or high-build primer, sand between coats |
| Yellow or brown spots | Knots or tannins bleeding | Seal with shellac-based primer and repaint |
| Fine surface cracks (checking) | Softwood face veneer movement | Oil-based primer and flexible acrylic topcoat; replace badly checked panels |
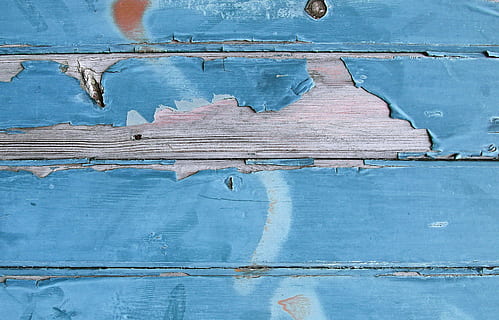
| Peeling | Dust, grease or no primer | Scrape, sand, clean, prime and repaint |
| Roller marks and lap lines | Overloaded roller, drying edges | Quality short-nap roller, thin coats, keep a wet edge |
Finish ideas for painted plywood
- Bright white or warm off-white: makes basements and garages feel larger and bounces light onto work surfaces.
- Two-tone walls: a darker, scuff-hiding color on the lower third and a light color above, divided by a chair rail or painted stripe.
- Whitewash: thin white paint with water, brush it on and wipe it back so the grain shows through, then seal with a water-based clear coat for a relaxed cabin look.
- Chalkboard or magnetic sections: specialty primers and paints turn part of a kids’ room or workshop wall into a usable surface.
How long does the job take?
For a typical single room, plan on one day for cleaning, filling and sanding, and a second day for priming and the first coat, with the final coat on day two or three depending on drying times. Oil-based products, cold rooms and humid weather all stretch the schedule, so read the recoat times on each can rather than guessing.
A useful way to plan is to break the work into dust days and paint days. Do all filling, sanding and vacuuming first, close the room overnight so airborne dust settles, then wipe the walls again before priming. Keeping sanding and painting on separate days is the simplest way to avoid specks of grit trapped in the finish, and it gives filler and caulk time to cure properly.
Safety and code notes
Wear a dust mask when sanding and ventilate well, especially with oil-based products. Building codes in the US set fire-resistance and flame-spread rules for interior finishes in some locations. A common example: the wall between an attached garage and the house usually needs gypsum board, so plywood alone may not meet code there. Check with your local building department before covering or replacing required drywall.
If you prefer a tougher, industrial look for a garage or workshop, compare this approach with metal panels for walls, and keep airflow in mind with our guide to garage door vents.
Bottom Line on Painting Plywood Walls
The finish you get is decided before the first coat of color goes on. Choose the smoothest plywood you can, fill and sand properly, seal knots, prime every inch, and apply two thin coats of quality acrylic paint with a light sand in between. Do that, and plywood walls can look clean, deliberate and durable for years.
Frequently Asked Questions
Do I need to prime plywood before painting?
Yes. Primer seals the porous wood, blocks knot and tannin stains and helps the paint stick and look even. Skipping it usually means more coats and a blotchy finish.
Can I use regular wall paint on plywood?
Yes. Interior acrylic latex wall paint works well on plywood once it has been sanded and primed. Eggshell or satin is the most practical sheen for most rooms.
How many coats of paint does plywood need?
Usually one coat of primer and two thin coats of paint. Dark colors, rough CDX sheathing or a big color change may need an extra coat.
How do I make painted plywood look smooth?
Start with sanded or pre-primed plywood, fill defects, sand to 180 or 220 grit, prime, and sand lightly between coats. Raking light while you sand helps you spot remaining flaws.
Should I seal painted plywood?
A quality acrylic or enamel paint does not normally need a clear coat. On high-wear surfaces a water-based clear topcoat can add protection, but test it first since some clear coats can yellow over light colors.